Using the Nx Dependency Graph in Custom Scripts

One of the powerful pillars of the open-source Nx monorepo toolkit is its dependency graph. In this article, we’re going to look into how we can leverage it in our own scripts.
Nx is an open source dev toolkit to help you scale development with monorepos. What makes Nx particularly stand out is
- dependency graph - Nx understands your workspace
- “affected” commands - that allow you to only build what really changed
- computational caching - Victor Savkin also wrote a blog post on “How to never build or test twice”
- it is tech agnostic - while Nx currently focuses mostly on the JavaScript ecosystem, there’s nothing in Nx that is particularly bound to it. As such even Java or .Net projects can be built with it
In this article I’d like to focus on the dependency graph in particular. Behind the scenes, whenever you reference a library within your workspace, Nx keeps track of that. By knowing the structure of the monorepo, Nx is able to provide significant improvements to the developer experience. One such improvement are the so-called “affected” commands. For instance to run your tests:
$ nx affected:testor
$ nx affected:buildto run the build of your apps and libs. Affected commands only execute the test/build/… on the changed apps and libs. As you can imagine, such commands can help you speed up your CI pipeline time quite a bit. Read more about it on the Nx docs.
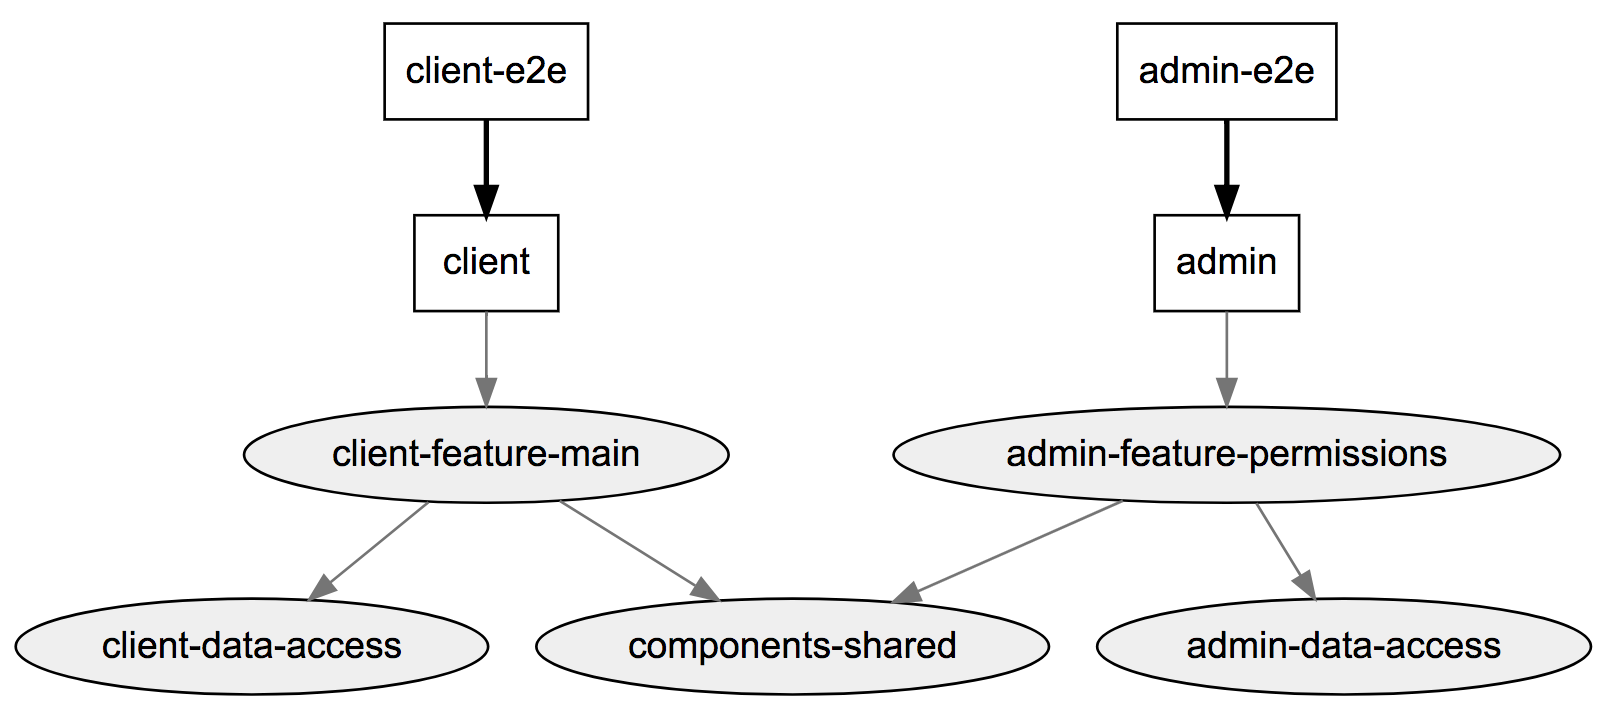
The interesting part is that the graph can also be visualized by running
$ nx dep-graphor by running affected:dep-graph to only visualize the affected nodes.
Isaac Mann has a short video that walks you through the visualization of the dep-graph
{{< youtube cMZ-ReC-jWU >}}
Access the project-graph from code
Nx comes with a set of built-in automation. But after all, each workspace is unique and you should customize it to your needs. For those custom automation scripts, it might be helpful to be able to leverage the dependency graph as well. There are several ways this can be done.
Approach 1: From TypeScript
Inside your TypeScript files, you can get the nodes of the dep-graph as follows:
import { createProjectGraph } from '@nrwl/workspace/src/core/project-graph';

const graph = createProjectGraph();
Note, the import is a deep import grabbing the function from the core/project-graph file. Since that is not part of the public API, it might be subject to changes. Just be aware of that.
Approach 2: Output to JSON
You can also output the graph into a JSON file like
nx dep-graph --file=testgraph.jsonThis is especially useful if you need to pipe it into another program again.
Approach 3: Print Affected
If you look at the distributed CI setup on the Nx docs, there’s an example for the Azure setup, which uses the dependency graph to calculate the affected nodes for then distributing the build accordingly.
This is an excerpt from that Node.js script:
const execSync = require('child_process').execSync;

const array = JSON.parse(
    execSync(`npx nx print-affected --base=${baseSha}`)
      .toString()
      .trim()
  ).tasks.map((t) => t.target.project);
Approach 4: Use the cached version of the dep-graph
Nx caches the dependency graph from previous operations in the node_modules/.cache/nx/nxdeps.json. Hence, we can directly use that cached version:
const nxDeps = require('.cache/nx/nxdeps.json');
...
Obviously, be aware that this file might change and thus break your code.
Approach 5: Print Affected Apps & Libs
The above mentioned approach 3 gives you already a lot of flexibility because it allows you to filter and manipulate the resulting JSON output.
As an alternative you can also use affected:apps and affected:libs. Especially if you pass the —-plain flag, it gives you a plain space-separated list of apps/libs you can again parse from a custom script.
$ nx affected:apps —-base=master —-plainMore can be found on the Nx docs.
Where to use it
There are two primary use cases for this inside an Nx monorepo.
- Workspace schematics - Schematics is a fancy word for “generators”, scripts that can be written in TypeScript and which are able to create, update or delete code from your workspace. Nx itself comes with a set of built-in schematics. Workspace schematics allow you to create ad-hoc schematics inside your monorepo
- Custom scripts - These are usually placed in the
toolsfolder of your Nx repo and can be shell scripts, Node.js scripts or whatever you really like. - Optimize your CI setup - by implementing distributed builds that parallelize across multiple nodes.
Conclusion
We’ve briefly looked into the Nx dependency graph, how it works, and especially how you can leverage it from your own code.