Create a dynamic tab component with Angular

The purpose of this article is to learn about the concept of dynamic components and template references in Angular by building a dynamic tab component. We will learn about ComponentFactoryResolver, ViewContainerRef, ngTemplateOutlet and ngTemplateOutletContext.
Contents are based on Angular version >=4
Update for Angular version 5: I just upgraded the article to match Angular version 5. You need to change ngOutletContext to ngTemplateOutletContext. Here’s a very helpful app for upgrading btw: Angular Update Guide
Egghead.io - Video Course
Learn about dynamic components in my newest Egghead.io video course. Check it out now:

The setup
This article is based on a previous one I’ve written where I built a tab component by leveraging Angular’s @ContentChildren and content projection. For a better understanding of this article here, I suggest reading that one first:
A follow up on thoughtram's excellent article on creating a tabs components with Angular
Great, to get a quick overview, our tab component API currently looks as follows.
<my-tabs>
  <my-tab tabTitle="Tab 1">Tab 1 Content</my-tab>
  <my-tab tabTitle="Tab 2">Tab 2 Content</my-tab>
</my-tabs>
As you can see, it is already possible to define tabs in a static manner, by using the my-tab component placed inside the <my-tabs>.
We now want to extend this API in such a way that allows us to dynamically open new tab pages based on the user interaction. Assume for example that we have a first statically defined tab which contains a list of people.
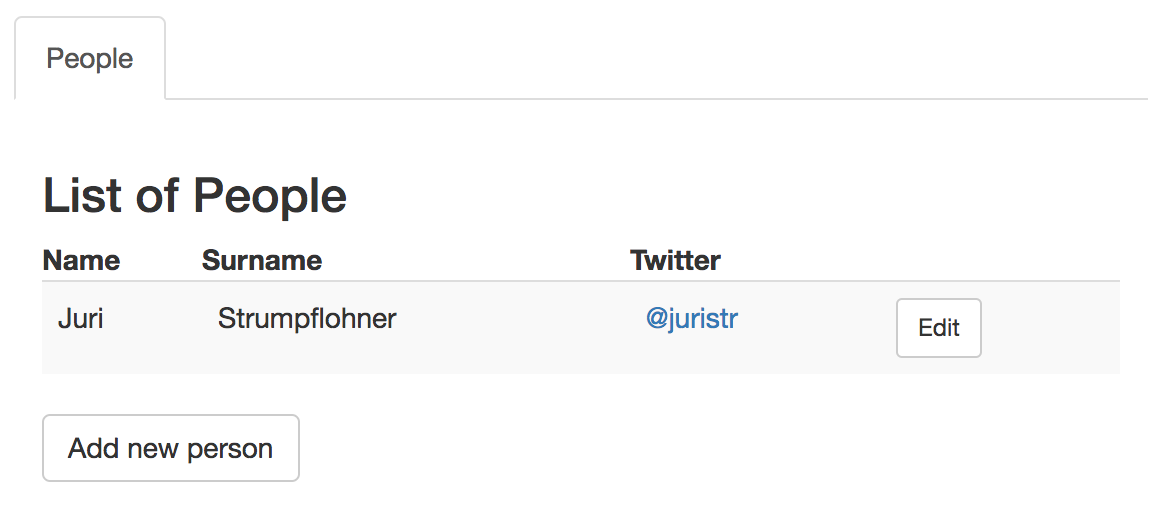
Whenever we click the “Add new person” or “edit” button beneath an existing record, we want the editing to take place in a separate tab pages that gets added dynamically.
TL;DR - Gimme a running code example!
Impatient? Jump to the end of the article for a running example of what we are building step by step in this article. Have fun!
Desired API for our dynamic tabs
So how does the API of our dynamic tabs look like. First, we need to be able to define the content of our dynamic tabs. We do this in the view of our AppComponent where we also have our <my-tabs> component. To define the so-called template of our dynamic tab we want to display, Angular gives us the <ng-template> tag.
<ng-template>
  Hi, I'm the content of a dynamic tab.
</ng-template>
So far so good. Remember the example we wanna build? So whenever the user clicks on that “edit” or “Add new person” button, obviously some handler in our component code is triggered. Inside there, we want to be able to invoke the creation of the new tab, something like this:
@Component({...})
export class AppComponent {
  ...

  onEditPerson(person) {
    this.tabsComponent.openTab(
      `Editing ${person.name}`,
      this.editPersonTemplate,
      person,
      ...
    );
  }
}
That’s it for the API we wanna have. Let’s continue now by digging deeper into the code and learn how the tabsComponent.openTab(…) function is implemented.
Reference elements from the view
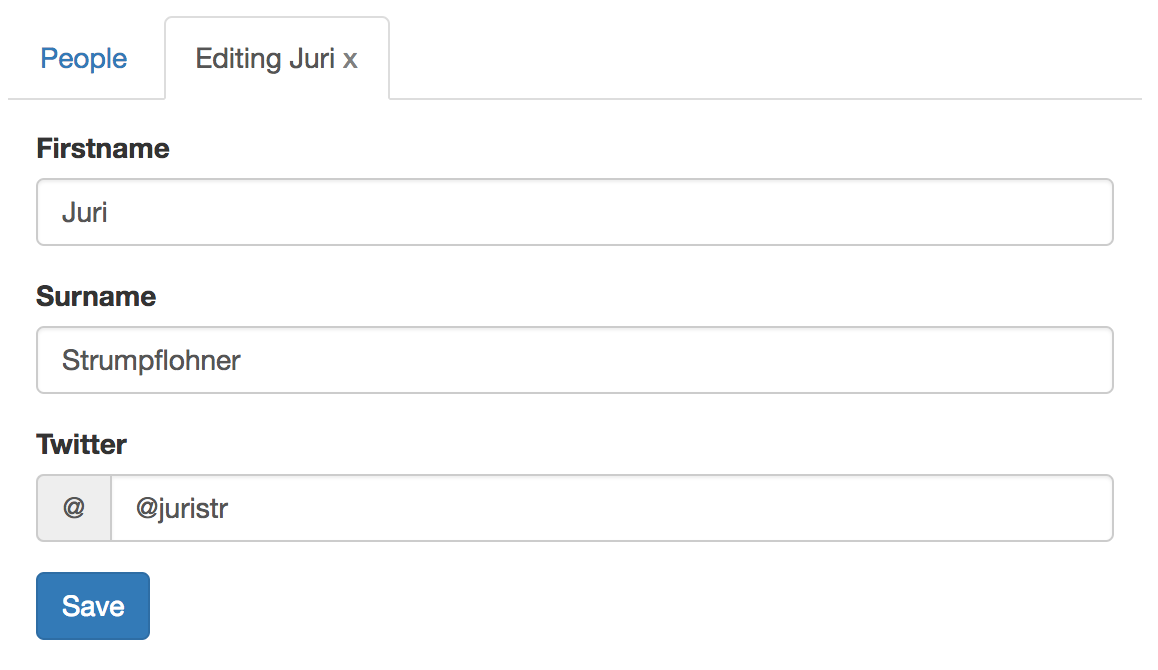
As you may have noticed, in our onEditPerson(…) function we reference two parts which actually origin from the AppComponent view template: this.tabsComponent and also this.editPersonTemplate.
<!-- AppComponent view template -->
...
<my-tabs>
  ...
</my-tabs>
<ng-template #personEdit>
  ...
</ng-template>
Note that we added a template variable to our <ng-template> from before. Within our AppComponent we can now reference our tabs component (<my-tabs>) as well as the ng-template by using Angular’s @ViewChild decorator.
import { ViewChild } from '@angular/core';
import { TabsComponent } from './tabs.component';

@Component({...})
class AppComponent {
  @ViewChild(TabsComponent) tabsComponent;
  @ViewChild('personEdit') editPersonTemplate;

  onEditPerson(person) {
    ...
  }
}
We grab the template by its name which we defined in the view, namely “personEdit”, while we can reference the TabsComponent directly by its type, which is obviously much more convenient.
Great, we now have all necessary variables to be passed to our openTab(...) function.
Define an Anchor point
Our plan is to dynamically inject new TabComponent instances into the TabsComponent. To do so we first of all have to define a region in our tab component where to place our dynamic tab pages. Currently our statically define ones are being loaded in via Angular’s content projection mechanism.
<!-- TabsComponent view template -->
<ul class="nav nav-tabs">
  <!-- nav tab headers are generated here -->
</ul>
<ng-content></ng-content>
The static tabs get “projected” into the <ng-content></ng-content> section and referenced in the code via the @ContentChildren. For more details read the according article I wrote a while back.
Note: we cannot reuse the same
@ContentChildrenmechanism because it only works for projected content which has to happen statically. Our tabs however are created dynamically on the fly, remember?
Similarly, we need to create a dedicated anchor point for our dynamic tab components.
<!-- TabsComponent view template -->
<ul ...>
  ...
</ul>
<ng-content></ng-content>
<ng-template dynamic-tabs></ng-template>
To do so I’m using an <ng-template> with a special directive attached to it: dynamic-tabs. Our so-called anchor directive is very simple:
import { Directive, ViewContainerRef } from '@angular/core';

@Directive({
  selector: '[dynamic-tabs]'
})
export class DynamicTabsDirective {
  constructor(public viewContainer: ViewContainerRef){}
}
We only need this one for the purpose of getting hold of the ViewContainerRef later. By injecting it in the constructor of our directive and by using the public modifier, we can later simply access it through that viewContainer variable.
Alternative: use a template variable as anchor
Instead of creating a dedicated anchor directive there is also the possibility to use a simple template variable and get its according view container via the @ViewChild decorator.
<!-- TabsComponent view template -->
<ul ...>
  ...
</ul>
<ng-content></ng-content>
<ng-template #container></ng-template>
In the TabsComponent class we then grab the view container of #container as follows.
@Component({...})
export class TabsComponent {
  ...
  @ViewChild('container', {read: ViewContainerRef}) dynamicTabPlaceholder;
  ...
}
dynamicTabPlaceholder directly references the ViewContainerRef instance which we can use right away.
Both approaches can be used as there are no major advantages or disadvantages. In this article we will make use of a dedicated anchor directive.
Dynamically instantiate the Tab component
Remember, each of our tab pages inside our tabs component is defined using the <my-tab> component. Normally the tab is defined within the template of some component like
<my-tabs>
  <my-tab [tabTitle]="..">The content</my-tab>
</my-tabs>
However, in our scenario we want to instantiate the <my-tab> in our code dynamically and set the according properties of it. More specifically we instantiate the underlying component class TabComponent.
For that purpose we need to get hold of a component factory matching our TabComponent. It’s as simple as injecting the ComponentFactoryResolver and then invoking its resolveComponentFactory(…) function passing in the type of component we want to instantiate: the TabComponent.
import { ComponentFactoryResolver } from '@angular/core';
import { TabComponent } from './tab.component';

@Component({...})
export class TabsComponent {
  ...

  constructor(private _componentFactoryResolver: ComponentFactoryResolver) {}

  openTab(...) {
    let componentFactory = this._componentFactoryResolver.resolveComponentFactory(TabComponent);
  }
}
Next, we need to get a ViewContainerRef which is where our dynamically instantiated component will be placed. We can get that view container from our anchor component as we just discussed (or via the alternative approach of using a template variable).
import { DynamicTabsDirective } from './dynamic-tabs.directive';

@Component({
  ...
  template: `
    ...
    <ng-template dynamic-tabs></ng-template>
  `
})
export class TabsComponent {
  @ViewChild(DynamicTabDirective) dynamicTabPlaceholder;

  openTab(...) {
    let componentFactory = this._componentFactoryResolver.resolveComponentFactory(TabComponent);

    // get the viewcontainer
    let viewContainerRef = this.dynamicTabPlaceholder.viewContainer;
  }
}
Once we have the component factory and the view container reference, we can finally instantiate our component by using the createComponent(…) function on the view container. Having the instance of the TabComponent we can then set its according properties.
openTab(title, template, data, isCloseable = false) {
  let componentFactory = this._componentFactoryResolver.resolveComponentFactory(TabComponent);

  // get the viewcontainer
  let viewContainerRef = this.dynamicTabPlaceholder.viewContainer;

  // instantiate the component
  let componentRef = viewContainerRef.createComponent(componentFactory);
  let instance: TabComponent = componentRef.instance as TabComponent;

  // set the props
  instance.title = title;
  instance.template = template;
  instance.dataContext = data;
  instance.isCloseable = isCloseable;

  ...
}
Render the dynamic template with NgTemplateOutlet
Last but not least we need to render the template in our dynamically created tab page. Remember, in our openTab(…) function we did pass in the template reference this.editPersonTemplate…
@Component({...})
export class AppComponent {
  ...
  @ViewChild('personEdit') editPersonTemplate;

  openTab(...) {
    this.tabsComponent.openTab(
      `Editing ${person.name}`,
      this.editPersonTemplate,
      person,
      ...
    );
  }
}
…which we have defined in our component view before:
<ng-template #personEdit>
  ...
</ng-template>
You may have noticed that in the implementation of the openTab(…) function we pass that template along to the TabComponent:
openTab(title, template, data, isCloseable = false) {
  ...
  let componentRef = viewContainerRef.createComponent(componentFactory);
  let instance: TabComponent = componentRef.instance as TabComponent;

  // set the props
  ...
  instance.template = template;
  ...
}
Inside there we can now render the template into the view of our TabComponent. Currently the TabComponent is defined as follows:
@Component({
  selector: 'my-tab',
  template: `
      <div [hidden]="!active"...>
          <ng-content></ng-content>
      </div>
  `
})
export class TabComponent {
  @Input('tabTitle') title: string;
  @Input() active = false;
  ...
}
Quite simple actually. It’s a container with a couple of properties, the most prominent one being whether the tab is active or now which in turn shows or hides its content.
To dynamically render the passed in template we use the <ng-container> and ngTemplateOutlet:
@Component({
  selector: 'my-tab',
  template: `
      <div [hidden]="!active"...>
          <ng-content></ng-content>
          <ng-container *ngIf="template"
            [ngTemplateOutlet]="template">
          </ng-container>
      </div>
  `
})
export class TabComponent {
  ...
  @Input() template;
  ...
}
Associate data to dynamic templates with NgTemplateOutletContext
Obviously a template without some dynamic data is quite boring. In our example, we need to be able to pass in the person object we’re editing. So let’s take a closer look at our <ng-template> definition:
<ng-template #personEdit>
  <person-edit [person]="person" (savePerson)="onPersonFormSubmit($event)">
  </person-edit>
</ng-template>
Inside the template the <person-edit> component takes care of editing our person record by creating a proper form with bindings, events etc.
Note: this is not scope of this article, but feel free to check out its implementation in the linked Plunker

The component takes an input binding [person] and has an outbound event (savePerson). Let’s first look at the simpler outbound one. We can directly hook it to the AppComponent code where our <ng-template> is defined and just implement the event as we normally would. Templates can directly bind to the component where they are defined, although they may end up being rendered inside another component, just as in our case inside the TabComponent. Think about it, this is really powerful.
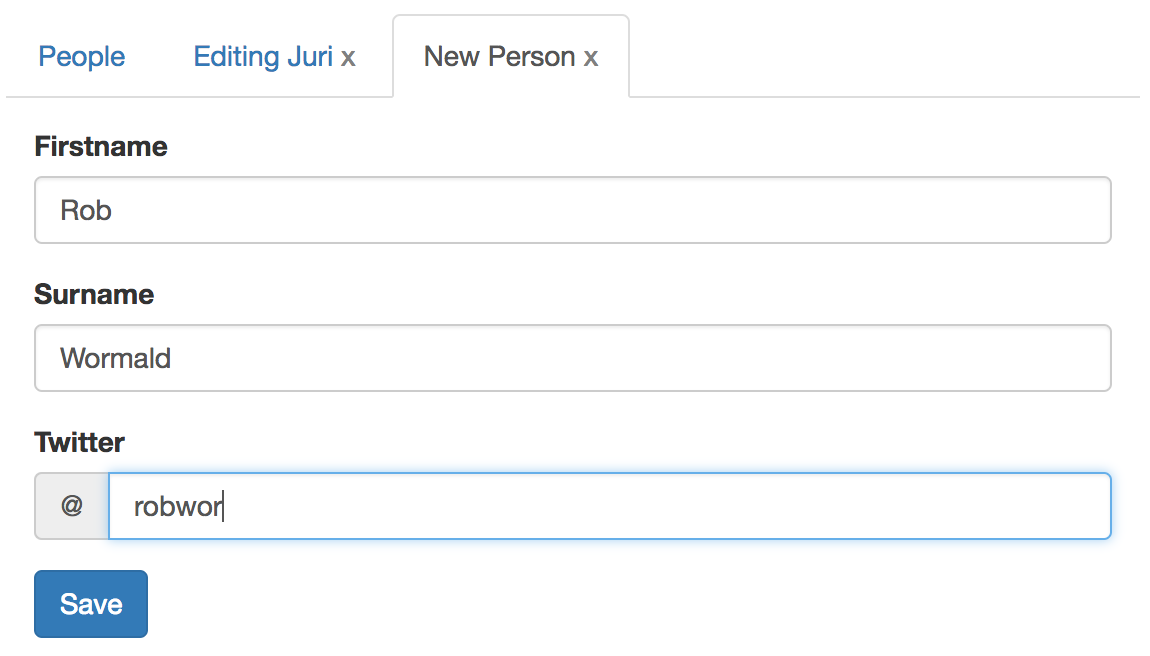
But what about our input binding [person]="person"? We could simply create a member variable person inside our AppComponent and assign it whenever we click on some person to edit. Sure, fair enough. But that wouldn’t allow us to edit multiple people simultaneously, such as:
Note, we have a tab open editing the person “Juri” while at the same time creating a new person record. As such, each template needs to get its own specific data. Luckily enough, there’s a way to do so.
First of all we need to define the variable on our template using the let-person="person" syntax:
<ng-template let-person="person" #personEdit>
  <person-edit [person]="person" (savePerson)="onPersonFormSubmit($event)">
  </person-edit>
</ng-template>
Next, within our TabComponent we need to bind the data using ngTemplateOutletContext.
@Component({
  selector: 'my-tab',
  template: `
      <div [hidden]="!active"...>
          <ng-content></ng-content>
          <ng-container *ngIf="template"
            [ngTemplateOutlet]="template"
            [ngTemplateOutletContext]="{ person: dataContext }">
          </ng-container>
      </div>
  `
})
export class TabComponent {
  ...
  @Input() dataContext;
  ...
}
Note, we give ngTemplateOutletContext an JavaScript object, which has a property person, which is exactly the one we previously defined: <ng-template let-person="...">.
The dataContext contains the person record that gets passed in via an @Input property to our TabComponent. Take a look at the openTab(…) implementation again.
Register the dynamic component on NgModule
Finally, to make dynamic components work, we need to make sure to register them to the entryComponents array on our NgModule:
...
import { TabComponent } from './tab.component';

@NgModule({
  imports: [ ... ],
  declarations: [
    ...,
    TabComponent,
    ...
  ],
  ...
  entryComponents: [ TabComponent ]
})
export class AppModule {}
Obviously, there are some more details to make the whole tab component work properly, such as keeping track of the dynamic components in an array to render the tab headers etc. They don’t really matter for the purpose here of learning dynamic components, but obviously feel free to check the source code.
Destroy a dynamic component
Well, whenever you’re creating something, especially in a dynamic way, make sure to also think about how to destroy it again. In our example, the user has the possibility to close a tab by clicking the “X” on the tab header. Moreover whenever the save button is clicked, the tab also closes automatically.
Fortunately, the ViewContainerRef has a function remove(idx) which allows to remove a previously added component via an index.
@Component({...})
export class TabsComponent {
  ...
  closeTab(...) {
    ...
    for(let i=0; i<this.dynamicTabs.length;i++) {
        ...
        let viewContainerRef = this.dynamicTabPlaceholder.viewContainer;
        viewContainerRef.remove(i);
    }
  }
}
Also take a look at the official docs for ViewContainerRef: https://angular.io/api/core/ViewContainerRef
The running example
Check out the full example in this Plunker here:
Conclusion - Wrapping up
Phew, that was quite long. Dynamic components in Angular initially seem like a mystery to many people. It’s not as easy as in AngularJS (version 1.x) where you could simply render in a DOM string containing a bunch of directives/components and they would automagically load up. Angular takes a more verbose approach as you have seen here. We talked about component factories, view containers and passing template references around. But it’s for a good purpose and once you played around with it, it isn’t that difficult after all. The main reasoning behind is to get static analysis by the Angular compiler. As you might have spotted, we used a well defined class, like the TabComponent, to get a dedicated factory for creating such components. Also, by having a view container, the compiler “knows” where your components will get placed. All this information helps the compiler to better reason about the application structure and thus to provide static analysis for better dev support, security and ultimately better performance.
Other examples Although this example is fully working, it was created for an academic purpose if you want, to learn more about dynamic components, view containers and how to pass around templates rather than to create a feature blown production read tab component. Of course, you’re free to use it if you want, but there are probably more feature complete ones out there already available for you. Here are some examples: