Create a CD pipeline with Angular, GitLab and Firebase

I’m a huge fan of automating all the stuff. Even if you’re a very precise and organized person, you’re likely to make mistakes. Be it because you do multiple things at the same time, you get distracted wherever. Machines won’t and better even, you spare lots and lots of time you otherwise would have to invest on annoying, repetitive and time consuming tasks. In this article we’re going to give GitLab’s CI/CD process a go.
So I started with the following setup:
- Angular project generated with nrwl/nx
- Git Repository hosted on Gitlab.com
- Backend and Hosting on Firebase
Step 1: Prepare your package.json scripts
One of the first steps is to prepare your package.json with a series of scripts that can be invoked from the build server.
Note: It’s considered an antipattern to have too much CI/CD specific scripts on your build server configuration. Rather try to have
npm scriptsor other kind of local script files that are simply invoked from the CI server. That way it’s easy to run them locally on your machine as well.
Configure build scripts
The build script is relatively easy. Inside my nrwl/nx workspace I generated an Angular app called “js-training” for which I have created a dedicated build:js-training script which uses the --app flag of the Angular CLI to execute just the build of that specific app (as there might be multiple ones).
{
  "scripts": {
    "build:js-training": "ng build --prod --app=js-training",
    ...
  },
  ...
}
Configure Karma test with headless Chrome
Besides automated deployment, running health & sanity checks is one of the biggest advantages of having an automated build pipeline. That includes running your unit tests.
By default, Karma is configured to run all of our tests in a Chrome instance. Meaning when you execute ng test, Chrome will be launched, executing all of them in a real browser window. Moreover it will remain in watching mode, s.t. changes to your test/code files are picked up and tests are executed again. That’s particularly helpful if you proceed in a TDD kind of fashion as you can keep your tests running while you code.
On the CI server however, we don’t have any UI running: we need a headless browser. PhantomJS is one choice, however it starts to get abandoned since a headless version of Chrome got announced.
Here’s an excerpt of how to adjust your karma.conf.js to be read to run on a CI server with headless Chrome.
// karma.conf.js
module.exports = function (config) {
  let configuration = {
    ...
    plugins: [
      ...
      require('karma-chrome-launcher'),
      ...
    ],
    ...
    autoWatch: true,
    browsers: ['ChromeHeadless'],
    customLaunchers: {
      ChromeHeadless: {
        base: 'Chrome',
        flags: [
          '--headless',
          '--disable-gpu',
          '--no-sandbox',
          '--remote-debugging-port=9222'
        ]
      }
    },
    singleRun: false
  };
  // when you are on the CI Server
  if (process.env.CI_SERVER) {
    configuration.browsers = ['ChromeHeadless'];
  }
  config.set(configuration);
};
Note, in the configuration above, I’m using ChromeHeadless even when running tests locally. It’s just faster. But for completeness I also included the part where you can check whether you’re running on a CI server (the CI_SERVER variable might be dependent on the concrete one you’re running on).
if (process.env.CI_SERVER) {
  configuration.browsers = ['ChromeHeadless'];
}
Using such conditions you can eventually overwrite an existing setting. Alternatively you can also steer which browser is being used via a dedicated script entry in your package.json:
{
  "scripts": {
    "test:ci": "ng test --no-watch --single-run=true --browser=ChromeHeadless",
    ...
  },
  ...
}
Step 2: Add Firebase configuration
I won’t go into too much details on how to setup Firebase as they have awesome docs & video tutorials:
- Go to Firebase and create a new project
- Install the firebase tools:
npm install -g firebase-tools - Use
firebase initand follow instructions.
As said, for any of these steps you should find plenty of documentation and articles 🙂. Alternatively you can check out my Egghead lessons:
Build and Deploy your Angular app to Firebase
Setup automated deployment with Angular, Travis and Firebase
In order to have our CI server be able to deploy to firebase we need to generate a proper authentication token that can be used when running the deployment script.
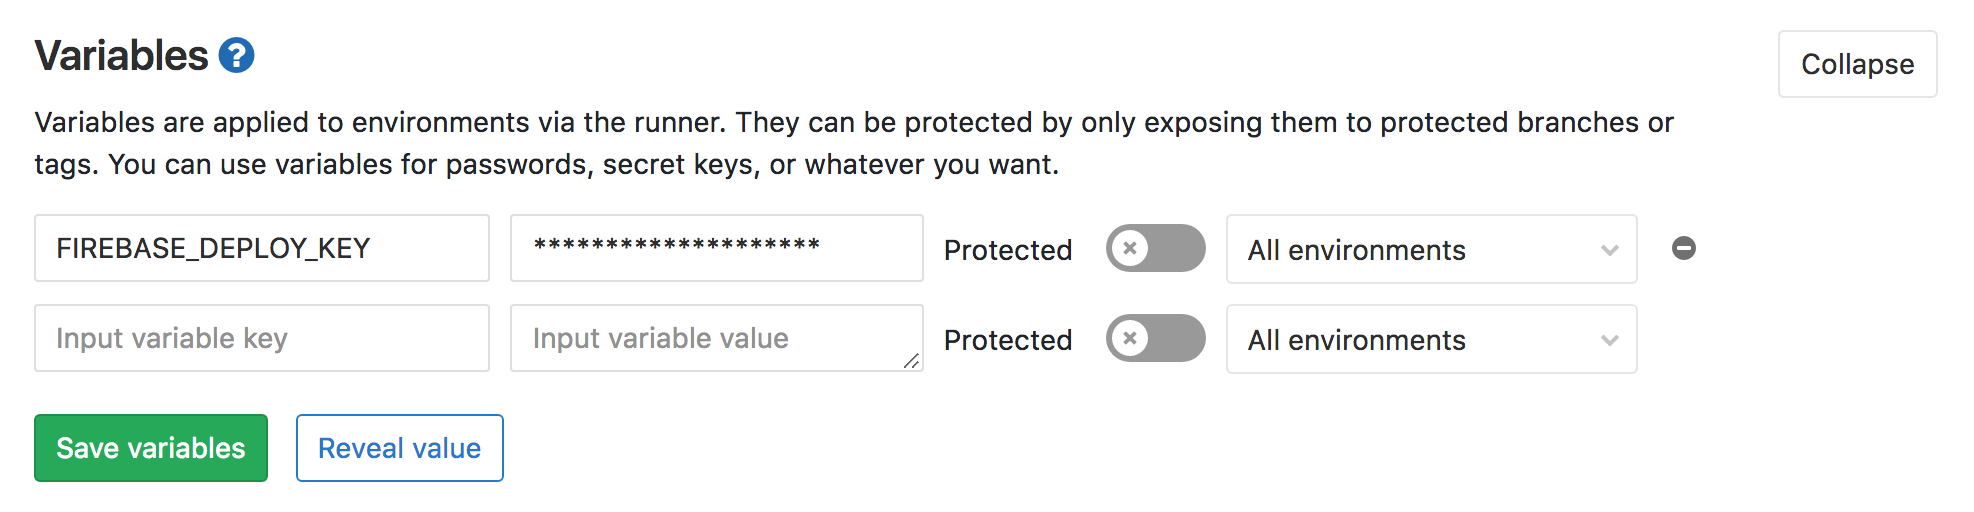
$ firebase login:ciThe $FIREBASE_TOKEN needs to be registered on your GitLab repository’s Settings > CI/CD Settings > Secret variables.
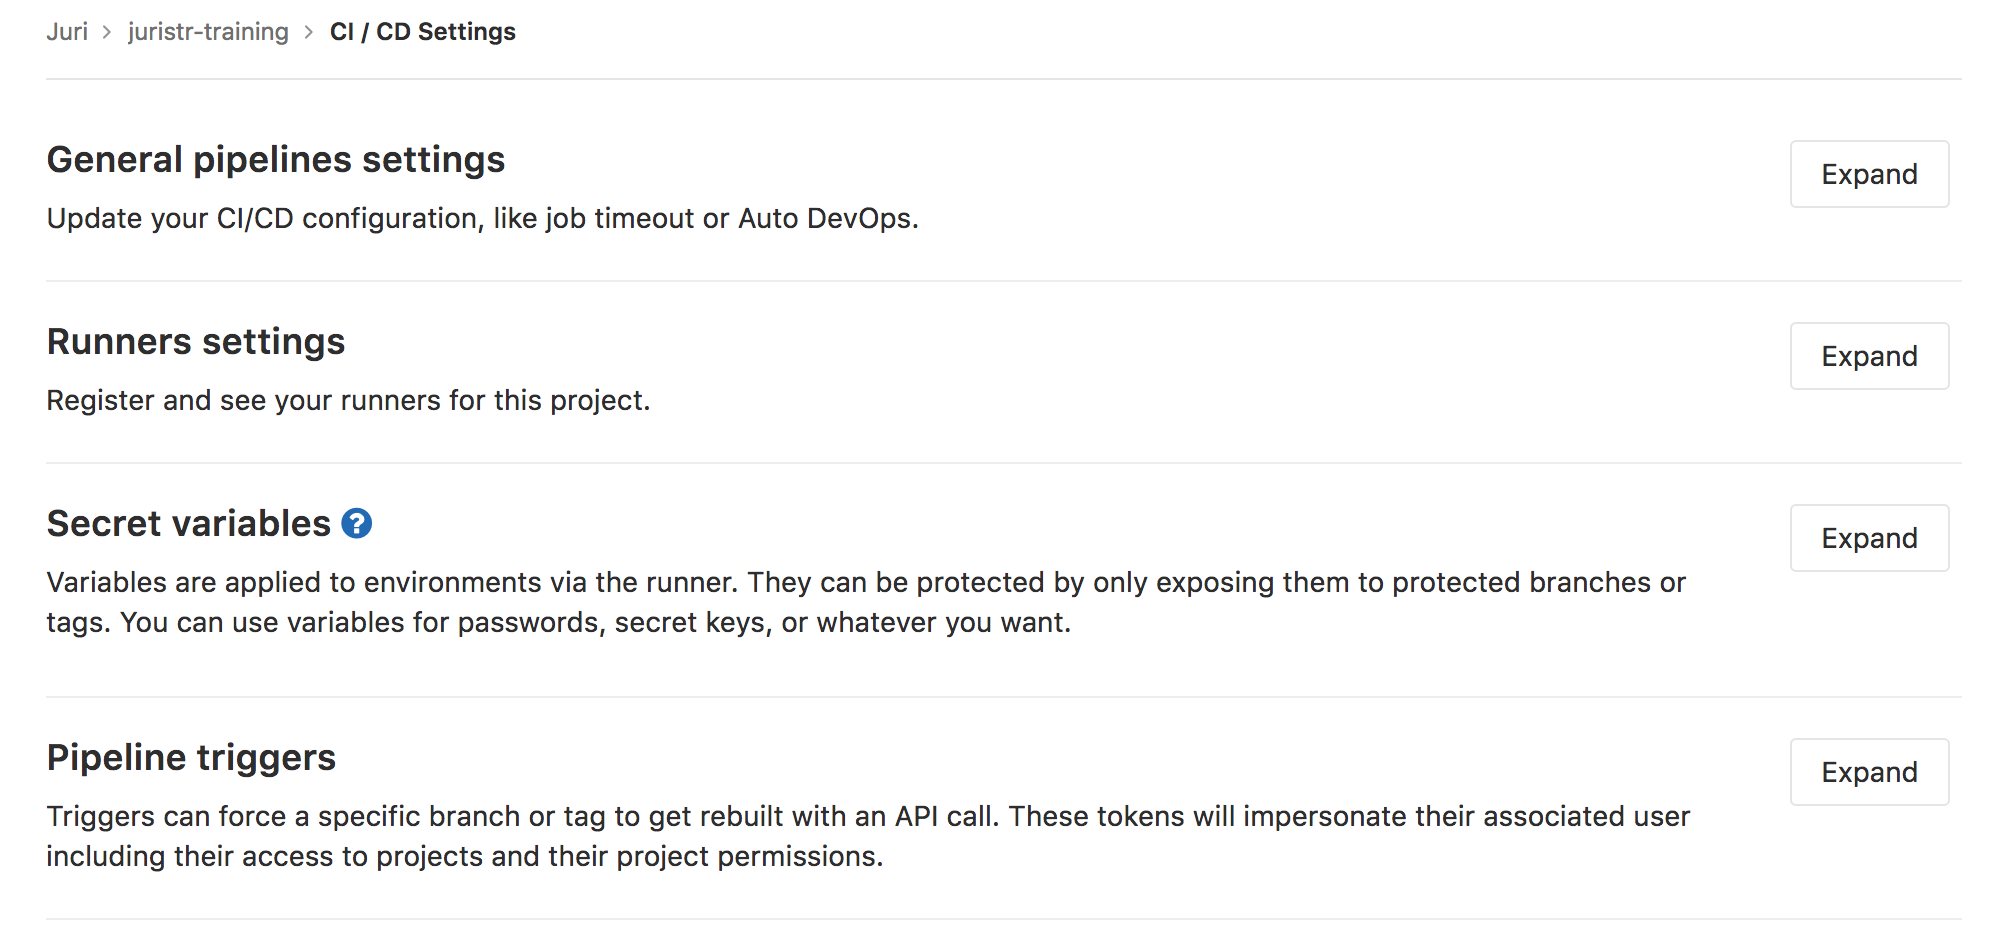
When configuring the variable in GitLab, make sure to not activate the “protected” flag, otherwise you will have issues in reading these variables during the build.
After we’ve configured our project with Firebase, let’s add the necessary npm scripts to deploy to Firebase hosting.
{
  "scripts": {
    ...
    "deploy": "firebase deploy --non-interactive --token $FIREBASE_TOKEN"
  },
  ...
}
Step 3: Configure GitLab pipelines
We’re ready now:
- we have configured our build scripts
- we configured headless test running
- we have a backend where to deploy to
What’s missing is to automate the whole pipeline with GitLab’s CI/CD infrastructure. The GitLab docs are superb and describe the whole setup and options you have very clearly. Here are some articles to get you started:
At the root of our repository, we create a .gitlab-ci.yml which contains the GitLab pipeline configuration:
// .gitlab-ci.yml
image: juristr/angular-ci-build:1.0.0
stages:
- build
- test
- deploy
before_script:
- npm install
- npm --prefix ./functions install
app-build:
stage: build
artifacts:
paths:
- dist/
script:
- npm run build:js-training
unit-tests:
stage: test
script:
- npm run test:ci
deploy-production:
stage: deploy
dependencies:
- app-build
script:
- npm run deploy
only:
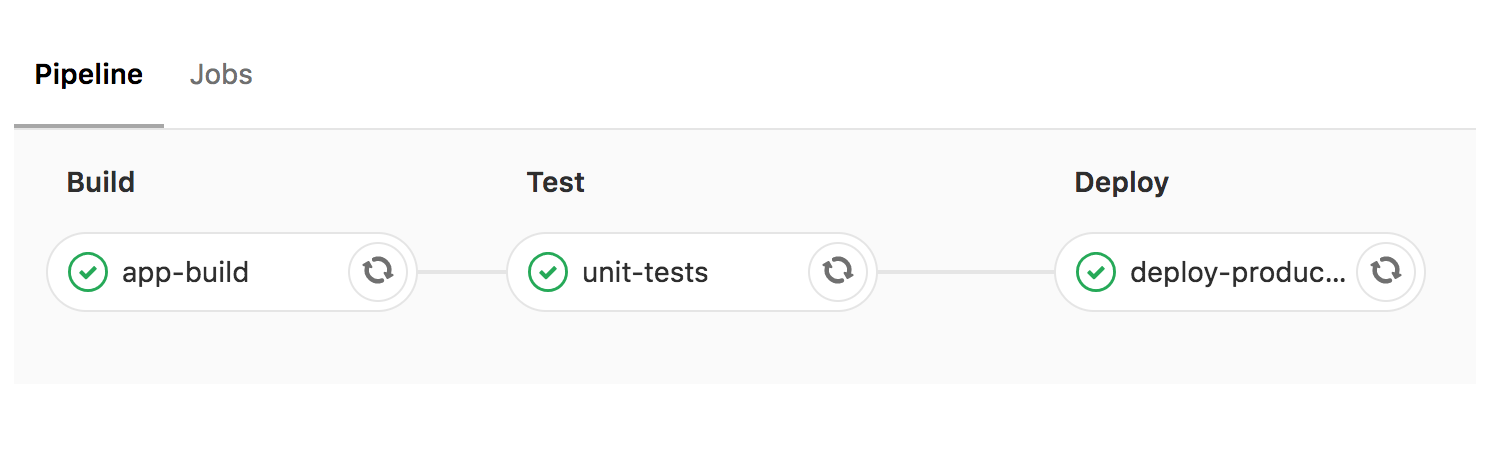
- masterLet’s cut this up in parts for a second.
The first step is to define our environment:
image: node:latest
stages:
  - build
  - test
  - deploy
Here we tell GitLab to use a Docker image node:latest as our base image for all builds. Note, you can also define an image property for each job separately if needed. Then we tell GitLab what stages we have, in our case build, test and finally the deploy stage.
We have to make sure to install the packages for each job (each of which runs independently of each other in a dedicated Docker container). For that purpose we can use a global before_script part. If needed, each job can have its own before_script as well.
before_script:
  - npm install
  - npm --prefix ./functions install
Next, let’s define our build job. We give that job the app-build ID (which needs to be unique) and assign it to the stage “build”. Next we define that we want to keep the dist/ folder as an artifact after the job succeeds. The dist folder contains our compiled Angular app. Finally in the script section we add the npm script that needs to be executed.
app-build:
  stage: build
  artifacts:
    paths:
      - dist/
  script:
    - npm run build:js-training
Similarly for our test part. We assign the job to the “test” stage. In order to be able to run our ChromeHeadless tests on CI, we need to have it installed. Make sure you use a proper Docker image which already includes it. I created one on purpose that helps building Angular on CI servers: image: juristr/angular-ci-build:1.0.0 (sources on GitHub)
You can either use it globally on your .gitlab-ci.yml (as in my case) or just for a specific task, like the testing one:
unit-tests:
  image: juristr/angular-ci-build:1.0.0
  stage: test
  script:
    - npm run test:ci
Great, last step, deploy to Firebase hosting. What’s particular of this step is that we don’t build our Angular app again, but rather we take in our app-build artifact containing the app bundle. By executing npm run deploy internally the firebase command we’ve prepared previously will be invoked.
deploy-production:
stage: deploy
dependencies:
- app-build
script:
- npm run deploy
only:
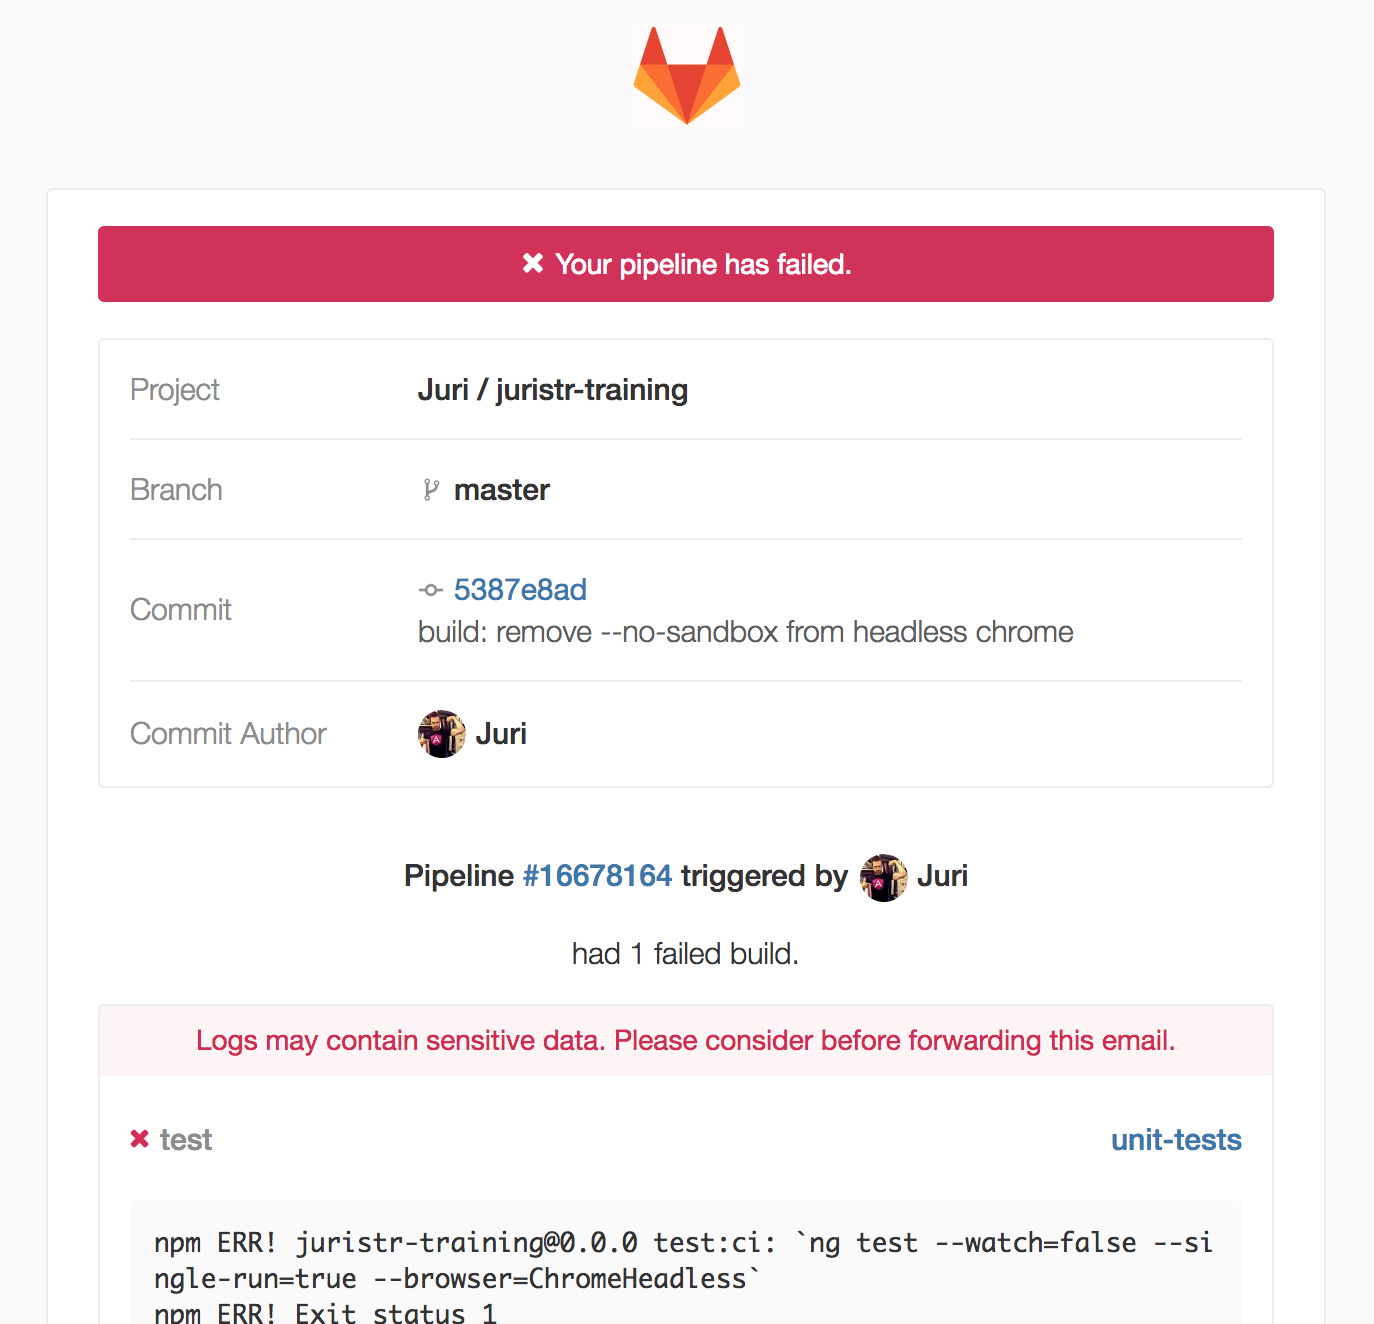
- masterOnce we have that and commit it to master, GitLab will automatically pick it up and execute our pipeline:
Step 4: Add Deployment Environments
Our current setup directly deploys to production, which can be scary if you don’t have any steps in between. Therefore, I’d like to change our pipeline slightly s.t.
- build
- execute automated checks (unit tests etc)
- deploy to a staging environment
- deploy to the production environment (only via manual trigger & if every previous step succeeded)
Configuring GitLab
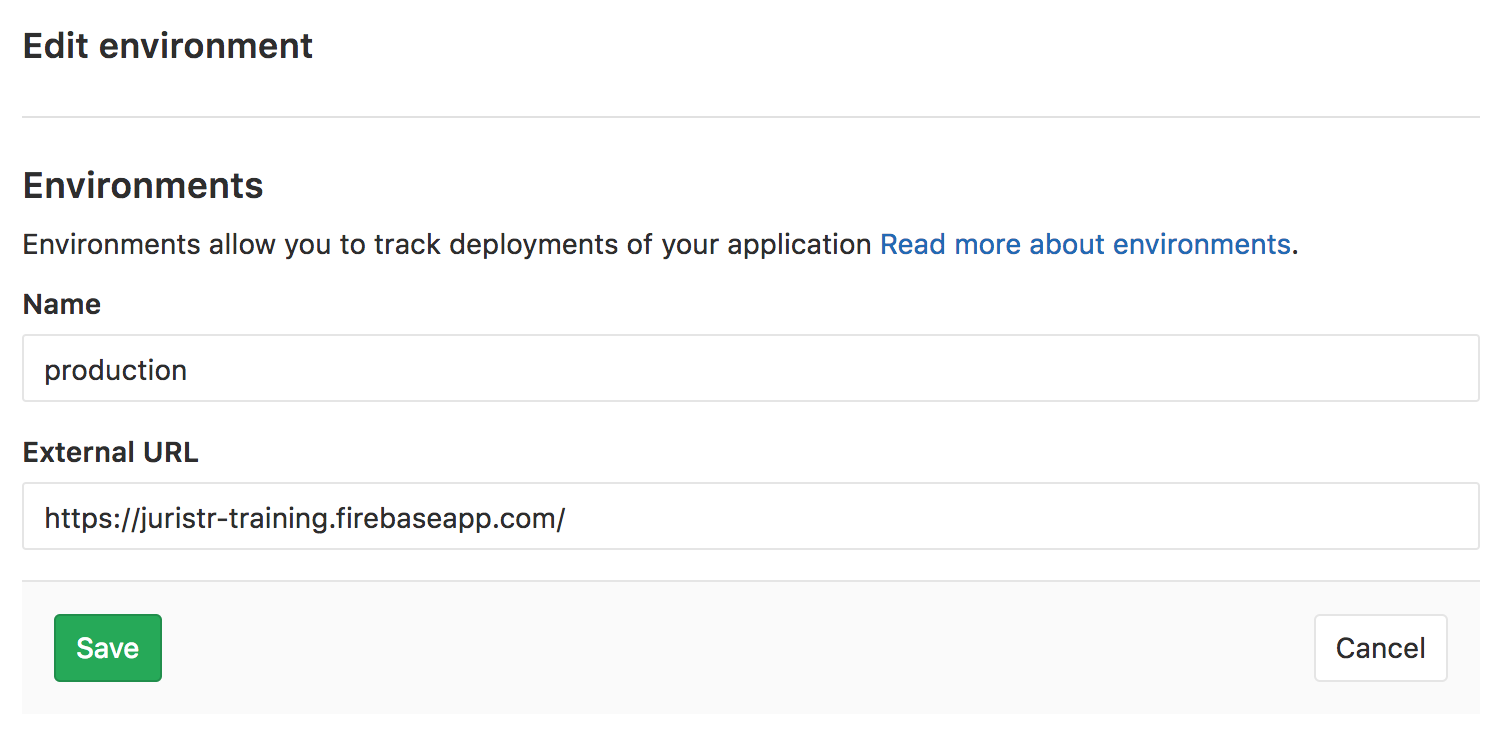
To add new environments in GitLab, first go to the web interface, navigate to your repository and then to CI / CD > Environments. There you can add 2 new entries, “development” and “production”.
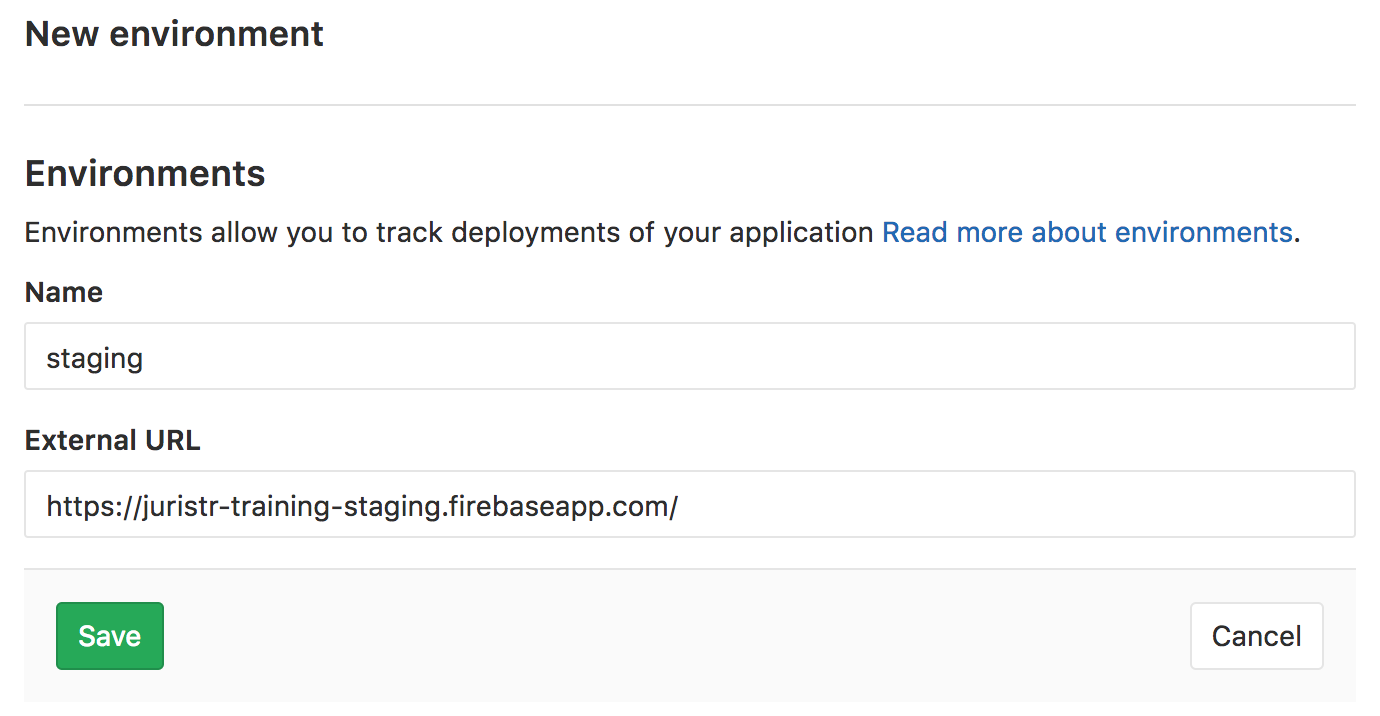
and finally our production environment:
Once that is done, we can add them in our .gitlab-ci.yml configuration file.
...
deploy-staging:
  stage: deploy-staging
  environment:
    name: staging
  dependencies:
    - app-build
  script:
    - npm run deploy
  only:
    - master

deploy-production:
  stage: deploy
  environment:
    name: production
  dependencies:
    - app-build
  when: manual
  script:
    - npm --prefix ./functions install
    - npm run deploy
  only:
    - master
Note the new environment property. Moreover in the deploy-production job I added the when: manual property. That way the production deployment has to be triggered manually.
Using the environment in our Angular CLI project
Inside our Angular CLI project we can make use of these environments. By default the Angular CLI already generates an environment.ts and environment.prod.ts, but you can add more as needed. Then in the build commands, we can tell the CLI which environment.ts file to take, using the --env flag. Check out my article on “Compile-time vs. runtime configuration of your Angular App” for more details.
When GitLab builds our project in the pipeline, it injects the name of the environment it is currently building for, via a proper variable: $CI_ENVIRONMENT_NAME. We can thus configure a environment.staging.ts and adjust our build script in the package.json. For example:
{
  "scripts": {
    ...
    "build:js-training": "ng build --env=$CI_ENVIRONMENT_NAME --app=js-training",
  },
  ...
}
Heads up: That means however, that we need to create a dedicated build for each environment! In the article I linked previously I describe the benefits/downsides of compile-time vs. runtime configuration.
Before adjusting our pipeline configuration, let’s configure different Firebase environments first.
Configure Firebase environments
Firebase projects don’t have specific environments, but rather you simply create a new project which works as your staging environment. Once you have that, you can add that staging environment to your existing Firebase project via the firebase-tools command line.
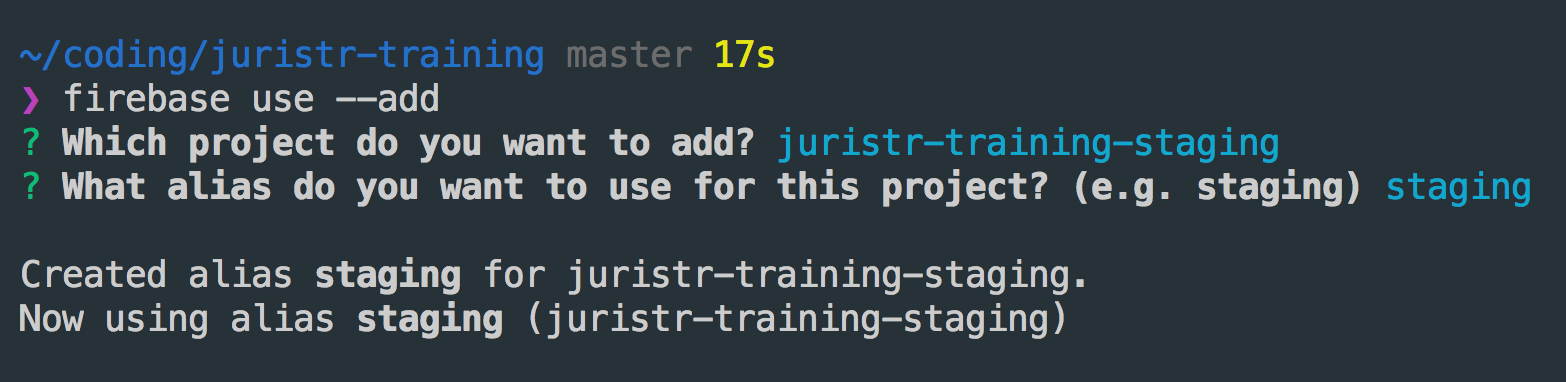
You should end up with a .firebaserc file having the following content:
{
  "projects": {
    "staging": "juristr-training-staging",
    "production": "juristr-training"
  }
}
Here’s a nice link from the official Firebase blog in case you want more details.
Finally we also need to adjust the package.json to take advantage of the newly configured GitLab environments in our firebase deployment scripts as well:
{
  "scripts": {
    ...
    "predeploy": "firebase use --token $FIREBASE_TOKEN $CI_ENVIRONMENT_NAME",
    "deploy": "firebase deploy --non-interactive --token $FIREBASE_TOKEN"
  },
  ...
}
Note how the predeploy step chooses the corresponding environment that gets passed in via the GitLab $CI_ENVIRONMENT_NAME parameter.

GitLab also nicely keeps track which commit has been deployed to which environment, also showing the play button here as well, which allows us to promote a given build from staging into production.
Further checks: nrwl/nx code formatting
We can now start adding further checks. nrwl/nx for instance has checks that verify the correct formatting of your source code using prettier rules. You can run those formatting rules either on the entire repository using npm run format:check or by passing in the the corresponding SHAs:
$ npm run format:check SHA1 SHA2We get the current commit SHA that triggered the pipeline via $CI_COMMIT_SHA and we can calculate (say the last 5) like this: $(git rev-parse $CI_COMMIT_SHA^5).
check-formatting:
  stage: test
  script:
    - npm run format:check $(git rev-parse $CI_COMMIT_SHA^5) $CI_COMMIT_SHA
Note we’re running this as part of the “test” stage, that way it gets parallelized with the unit tests.

Conclusion
So in this article we’ve covered the basic setup of an automated pipeline using Angular, nrwl/nx and Firebase on GitLab.
Setup deployment early in the process - Don’t wait too long. Initially it’s easy, you just have the initial scaffold of your project, no strange external libraries or special situations. The longer you wait the more complex it gets. Complexity can be mitigated by incrementally adjusting your build pipeline configuration as the project evolves.
Build on every commit - The main benefit of an automated pipeline is to get feedback as early as possible in the process. Thus, build every commit, regardless whether it’s to master, or a PR. Whenever something fails, GitLab (or every other CI server) will send the commit author some nicely formatted message about what happened, so that you can immediately react: