Release your libs like a pro!

Automate, automate, automate. That’s what ultimately is our job, right? We automate the tedious processes of our end-users. So why don’t we do it for ourselves as well? This guide quickly illustrates how to setup fully automated releases to Bower and NPM. And they’re even automatically semantic versioned.
Bower, NPM, semantic versioning?? Sounds strange? Check out my article Node, Grunt, Bower and Yeoman - A Modern web dev’s Toolkit.
I love to contribute to Open Source libraries on GitHub and so should you!. You learn a lot, it’s coding as a hobby (not for being payed) and finally it’s also rewarding, especially when you then see people use your stuff, discuss with them etc. Most of the projects that get shared on GitHub are utility libraries that are designed to be highly reusable across projects. As such (for being discovered and used), they should follow a series of good practices like
- have good documentation (gosh! :unamused: )
- CONTRIBUTING.md
- automated tests
- …
- have automated builds in place
- be released on package managers to be easily discoverable
- follow the semver specs
- have a changelog
The last points are the ones I’d like to address with this article as they’re something I see devs and library publishers often struggle with.
Issue 1: Have automated builds
You certainly already have your build scripts in place. Like a Grunt, Gulp, Webpack script or whatever of the currently fancy build tools you’re using. When you have that (and you definitely should), then you’re only steps away from a full blown automated build. Such a continuous integration server is extremely valuable as it builds your code, maybe lints it, executes your tests, frankly, it helps you keep your code working. This becomes even more important when other developers start to contribute to your library (which is the goal after all).
As we will see, it’s super easy to setup such a CI server and it’s even totally free.
Issue 2: Releasing on package repositories
I’m mainly talking about JavaScript here as it is currently the prevalent language on GitHub, but it can be easily generalised to other languages as well. When you develop a library and you share it on GitHub, you want it to be used by others. Thus, installing your lib has to be as easy and straightforward as possible. This can be achieved by deploying your lib’s distribution files to so-called package managers. Currently the most used ones are NPM and Bower. There are other package managers on the way like JSPM as well. Deployment is done similarly as with Bower, though.
With distribution or “dist” files I intend the compiled, minified and packaged version of library that will be included in other projects.
Issue 3: Follow the semver spec
When you release a new version of your library, it is important to communicate your changes. Did you add new features? Just patched some bugs? Are changes breaking? These are important things for a developer in order to know whether it is safe to upgrade. Package managers like Bower and NPM provide even mechanisms to perform automatic upgrades to the next “safe” version. Obviously this only works if you properly follow the semver spec.
Sadly, that’s where most libs fail. Should we increment the patch? The minor? Well, we did add some features, but hey…they aren’t thaaat huge.. maybe we should just increase the patch.
These are the kind of thoughts going on…worse: increase the minor even if it’s a breaking change. You won’t believe, but popular libraries like Angular v1.x do that!!
It doesn’t have to be like that, though. The semver spec is quite clear and should not leave any doubts: machines can do it for us! That’s probably what Stephan Bönnemann thought as well and started to automate the whole stuff. We’ll shortly see how.
Issue 4: Changelog
Finally, the change log. 95% of the time absent, 5% of the time hand written and often very flaky. It’s like everyone wants to have one, but it’s hard work to get it right.
As someone recently said to me: “work smart, not hard” :smiley:. Heard about “conventional commits”?? If I’m not wrong, the Angular team first introduced them: read here.
tl;dr: It’s basically a convention to write your commit messages in a structured way such that can then be easily parsed by a program into a change log. Like..
- **chore(<target>): <message> -** for housekeeping stuff
- **fix(<target>): <message> -** when fixing a bug
- **feat(<target>: <message> -** when adding a new feature
- ...
Examples:
feat(core): add undo/redo functionality

It is now possible to undo/redo changes applied to the model. Simply invoke...
or a breaking change
feat(..): bla bla

bla bla

BREAKING CHANGE:
This is a breaking change. Before you did... now you have to ....
Takes a bit of time to get accustomed, but once you have it, you get nicely readable commit messages.
You know about how to polish your git commit messages, don’t you?
Love it! Show me how to get it for my lib!
Ok, glad you’re interested. Let’s get started.
Get your build scripts ready
You might use different tools for building your project: grunt, gulp, webpack or even just npm. I’ve found that the most convenient way is to hook your scripts directly into the package.json file s.t. Travis (we’ll see later) can invoke them simply by using npm.
Assume you use grunt and your build command is grunt build. Then open your package.json and add a “scripts” section if there isn’t one already.
...
"scripts": {
  "build": "grunt build",
  "test": "grunt karma:ci",
	...
},
...
You can now run your build also through npm itself using npm run build or npm run test. This is required for later hooking everything up with Travis. Moreover it is nice as you can easily change your build and test commands from within this single file.
Setup Travis
Travis is the continuous integration server for GitHub based projects. It has quite good docs, so you should find everything you need to get started. For JavaScript based projects start here: http://docs.travis-ci.com/user/languages/javascript-with-nodejs/.
What it’ll ask you is to create a “.travis.yml” file. Here’s an example:
sudo: false
language: node_js
cache:
  directories:
    - node_modules
branches:
  only:
    - master
notifications:
  email: false
node_js:
  - '4.1'
before_install:
  - npm i -g npm@^2.0.0
  - npm install -g grunt
  - npm install -g bower
  - npm install
  - bower install
...
The important things to grasp here are:
branches:this setting makes sure that only pushes to the master are being build. You can also blacklist your branches, just have a look at the official docs. Note, PR will be build anyway, so you don’t loose that comfort.before_script:a series of commands to run before Travis starts building your project. In this section here you have to make sure you setup the build environment, like installing tools such as Grunt, Gulp or whatever you need.
Moreover for Travis to work properly, you have to add the prepublish hook point.
...
"scripts": {
  "build": "grunt build",
  "test": "grunt karma:ci",
  "prepublish": "npm run build",
	...
},
...
semantic-release to the help
Finally, semantic-release. This is an awesome library that automates
- the determining of the correct semantic version based on your commits
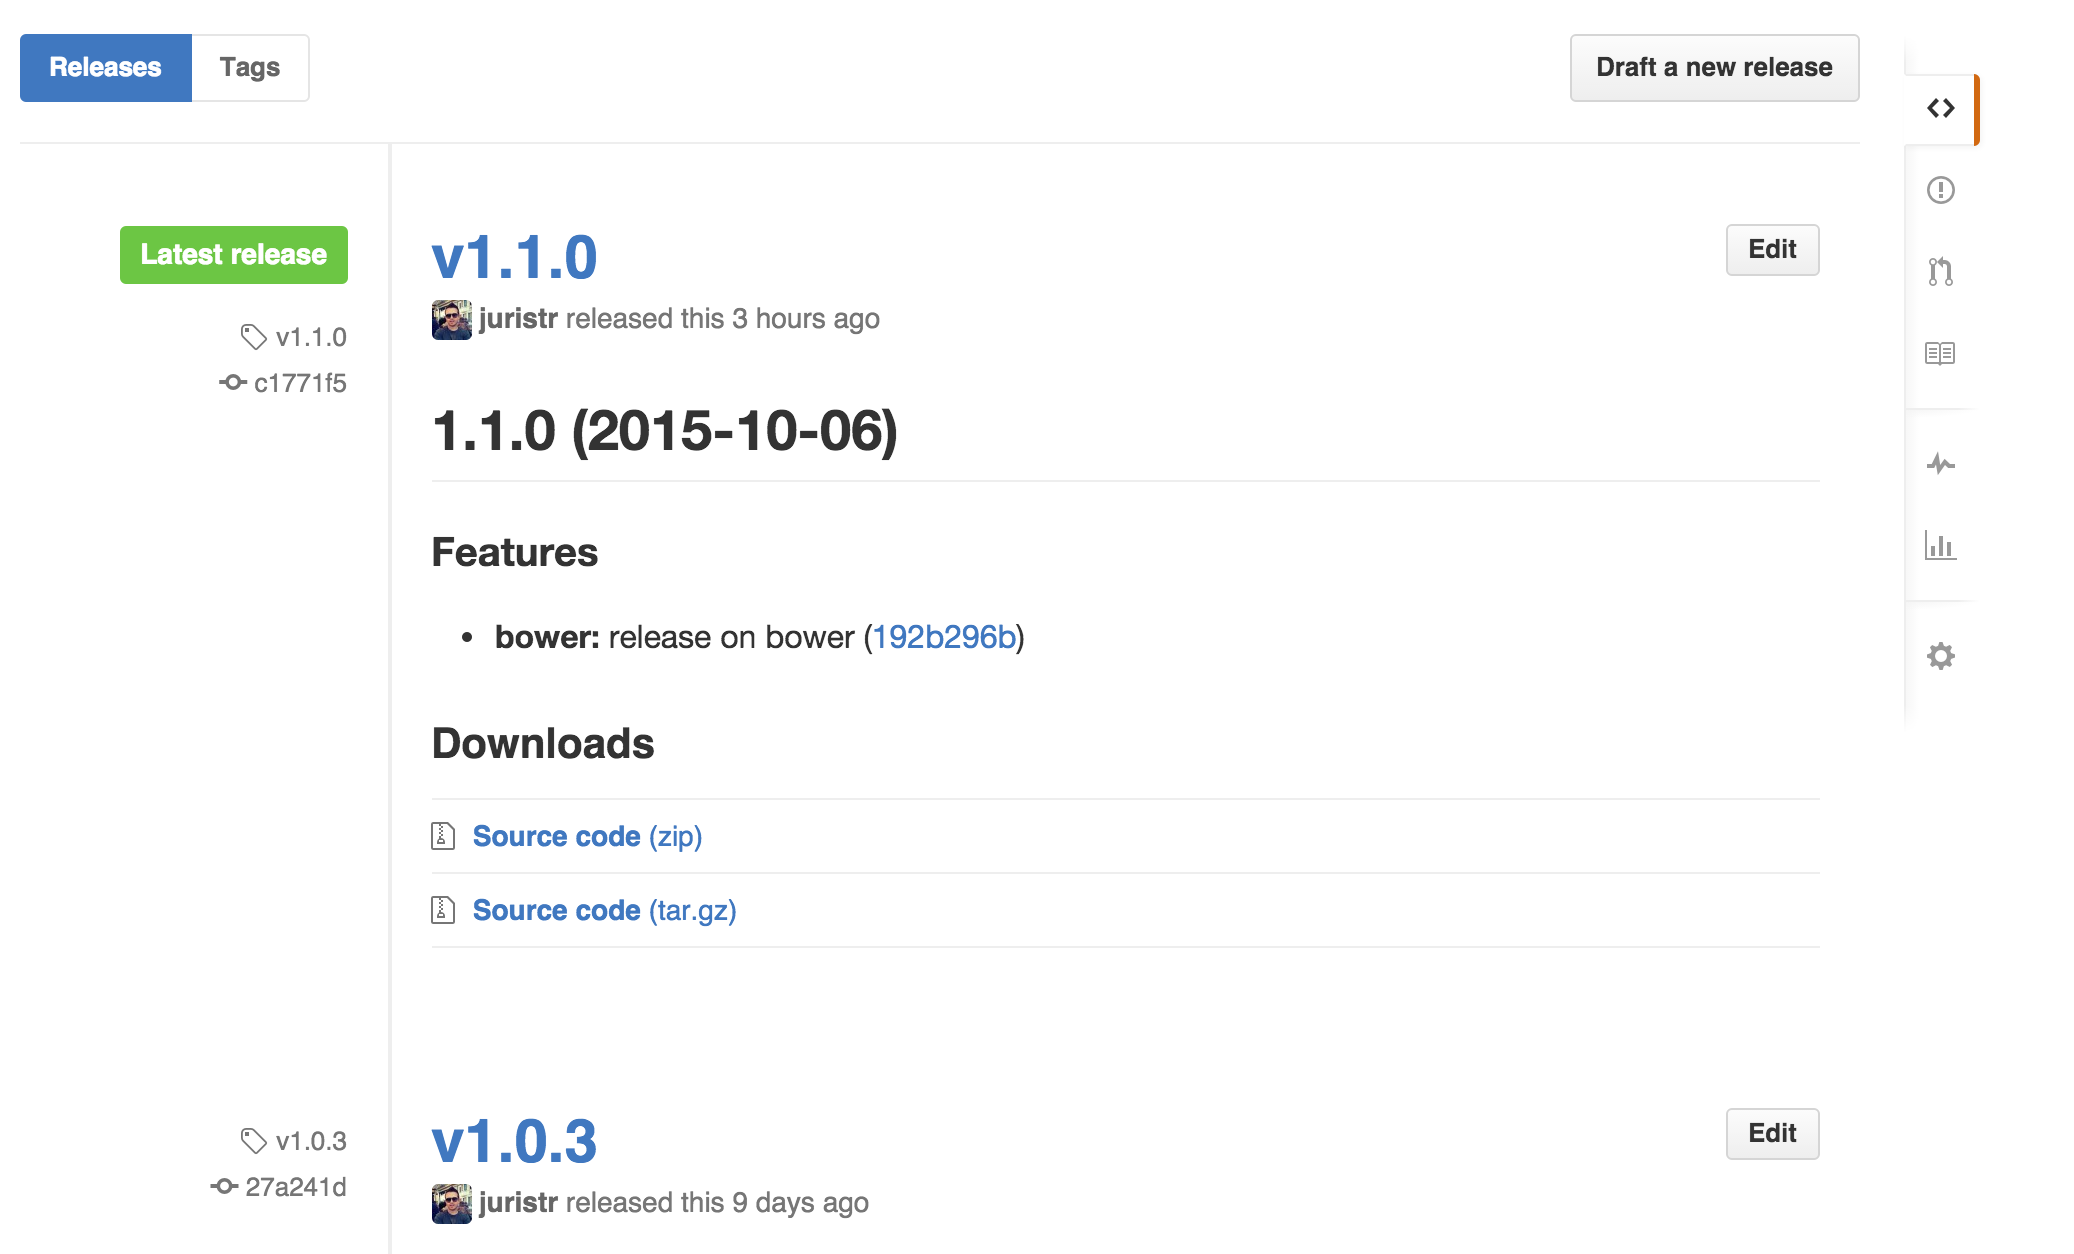
- creation of a GitHub release (including setting the tag to the correct version, generating a changelog)
- release on npm
- … (more plugins on the way) …
Just go to the main repository. There are a couple of introductory videos, linked articles and obviously all of the instructions on how to get it up and running.
In the end, what you need to do is to run the semantic-release cli which will do the job of authorizing Travis to publish to your GitHub and npm repo and to properly setup your package.json file. It’ll also add a semantic-release step in the scripts section of the package.json.
...
"scripts": {
  "build": "grunt build",
  "test": "grunt karma:ci",
  "prepublish": "npm run build",
  "semantic-release": "semantic-release pre && npm publish && semantic-release post"
},
...
Bower support
Update: People tend to use NPM primarily even for web applications nowadays. I’m leaving the Bower section for completeness here.
When you succeed to setup the before mentioned setups, you should now have
- automated build by Travis
- automated release on GitHub
- automated releases on npm
The last step that’s missing is to release on Bower (if you want to support that). To be honest, the fame of Bower is decreasing. People are favouring npm as most probably they’re already using it anyway for some NodeJS based backend or at least for the tooling. Nevertheless, Bower is still a reality and people are demanding for it.
The problem is that Bower is not so easy to setup as NPM. It doesn’t allow to publish your binaries to a registry, but rather it works directly off your git repository.
Bower requires you to
- have a
bower.jsonfile (just likepackage.json) - create a semantic git tag on the repository
- publish your built-files to your repository.
Point 1 and 2 shouldn’t be that hard to satisfy. Creating a bower.json is as simple as invoking bower init and semantic-release will take care of creating the correct git tag.
The critical point is to push the built-files, that is, your compiled and minified JavaScript code, CSS etc., to the repository. Why’s that? Well, first of all, having generated files on master is a mess, with PR, commits and much more. Kent C. Dodds recently published a nice article on why he doesn’t commit generated files to master any more.
What would have to happen is the following:
- You push a new release on master
- Travis starts building
- Travis generates the build files
- Semantic release creates a proper tag
- Travis pushes back to master with the new dist files
- (that would trigger another Travis build?..)
It’s a mess. Mostly I don’t like the idea of having an automated machine push to master. Kent C. Dodds had the same issue and decided to solve and automate it: publish-latest
Install the library and add it as postpublish task in the package.json file:
...
"scripts": {
  "build": "grunt build",
  "prepublish": "npm run build",
  "postpublish": "publish-latest",
  "test": "grunt karma:ci",
  "semantic-release": "semantic-release pre && npm publish && semantic-release post"
},
...
He has an interesting solution: publish-latest creates (if it doesn’t exist) a new latest branch where the distribution files will be placed (usually in a dist folder). That branch will be tagged by semantic-release and then publish-latest pushes that branch back to your GitHub repo. Hence, you’ll end up having your master clean with just the source code and a latest branch containing the latest, compiled and minified files to be distributed. Since the tag is on that branch, Bower will also find it easily and your users will be able to install it from there without any issues.
Other tools
Gleb Bahmutov has published a series of useful tools which help to automate the release process around semantic versioning (some of them are even plugins for the semantic-release package).
- next-ver is like local semantic-release; it bumps local version based on commit log from the last version.
- condition-circle is a semantic-release plugin. If you use other CIs and not Travis you will need to let semantic-release know about it. For example in the case of CircleCI.
- condition-node-version is a semantic-release plugin that allows publishing from a specific NodeJS version. Otherwise it will publish from the last finished build job.
- dont-crack is a semantic-release plugin that verifies whether a new semantic release breaks any dependent projects.
Conclusion
You know what’s best of all this. Whenever now someone sends you a PR, Travis executes the tests against the new contribution, does all the checks you’ve setup (linting whatever..) and if everything is fine, you are 1 click away from merging and releasing a new version with the new contribution.

Here are some of my repositories where I’ve already set this up, as well as others which you can use as an example to get started.
- angular-model-factory
- angular-translate-loader-pluggable
- angular-openlayers-directive
- angular-formly
- feel free to let me know about others
Besides the article I mentioned above, Kent C. Dodds has done a lot of research on how to best create an Open Source JavaScript library and shares his knowledge in this series of Egghead.io videos. Definitely worth watching (I’ve not done it yet… :flushed:).