Node, Grunt, Bower and Yeoman - A Modern web dev's Toolkit

This article aims at introducing you to some of the currently most popular tools when developing modern web applications with JavaScript. These are totally not new at all and have been around for a couple of years now. Still, I found many devs still don’t use or know about them (as you might), wherefore this article tries to give you a quick, concise intro to get you started.
It's always nice when people contribute to your articles through comments or by resharing it with their mates. That said, I'm happy to announce that Philippe Poumaroux translated this article into French. So, if you're interested, you can find it here.
Node and NPM
Node.js brings JavaScript to the server and the desktop. While initially JavaScript was mainly used as a browser based language, with Node you can now also create your server-side backend or even a desktop application with node-webkit (for the crazy ones among you).
Node.js® is a platform built on Chrome’s JavaScript runtime for easily building fast, scalable network applications. Node.js uses an event-driven, non-blocking I/O model that makes it lightweight and efficient, perfect for data-intensive real-time applications that run across distributed devices. nodejs.org
Creating a web server is as simple as these couple of lines of code.
var http = require('http');
http.createServer(function (req, res) {
  res.writeHead(200, {'Content-Type': 'text/plain'});
  res.end('Hello World\n');
}).listen(1337, '127.0.0.1');
console.log('Server running at http://127.0.0.1:1337/');
To run it, execute:
$ node start
Server running at http://172.0.0.1:1337/
One of the great things about node is its enourmous community which creates and publishes so-called node modules on the NPM directory, Node’s package manager. Currently there are about ~90.000 modules and there have been around ~390.000 downloads last month.

Besides creating server-side applications with Node, it has also become the VM for JavaScript development tools like minifiers, code linters etc. Both, Grunt and Yeoman (described in this article) are based upon Node’s infrastructure.
More on nodejs.org and npmjs.org.
Installing Node
So, to get started, you have to first install the Node runtime. The best way to do so is to download the desired package from the official site. This will also automatically install NPM on your machine.
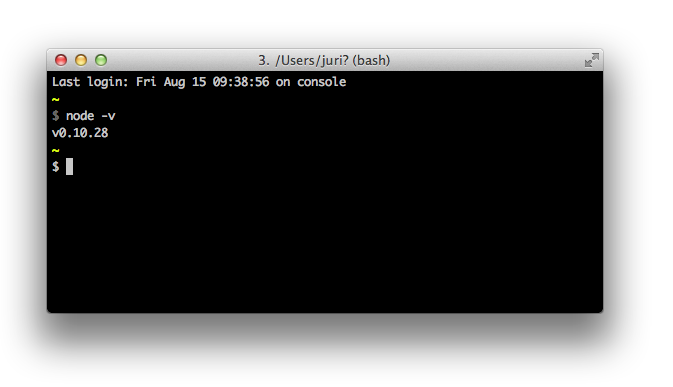
Once that’s done, typing..
$ node -v..into your terminal should output the installed version of node and thus confirm you’re ready to go.
Installing node packages
Installing a node package is as simple as executing:
$ npm install gruntThis installs the grunt node package into a folder called node_modules.
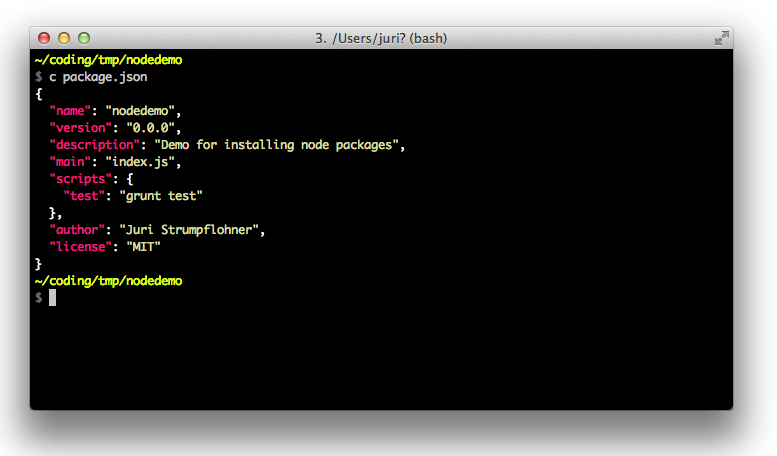
The best practices approach though is to create a package.json file. Since the suggested approach is to not commit the content of your node_modules folder to your VCS, but rather to automatically reinstall them during the build process, you need a place to keep track about the installed package and its according version: package.json.
To create a new package.json file, simply execute npm init inside a clean folder. You’ll have to answer a few questions but ultimately you will get a nice new package config file.
Whenever you install new packages you then use the --save or --save-dev option to persist the package into the package.json file. For instance, executing…
$ npm install --save-dev grunt…will automatically add grunt to the devDependencies section of the package config file:
{
  ...
  "devDependencies": {
    "grunt": "^0.4.5"
  }
}
Similarly, if you add --save it’ll be added to the dependencies section. The difference is mainly that dependencies are actively used by your application and should be deployed together with it. On the other side, devDependencies are tools you use during the development of the application, which normally do not require to be deployed together with it. Examples are code minifier scripts, test runners etc.
When another Node package depends on yours, then it will automatically install all runtime dependencies of your package, but not your development dependencies. This is an important difference between dependencies and devDependencies that should be taken into account.
To uninstall a package, use..
$ npm uninstall --save-dev grunt..which uninstalls grunt and removes it from package.json.
Global packages
Beside simply installing packages either as dev or runtime dependencies, there is also the concept of global modules. They are installed by using the -g flag..
$ npm install grunt -g..and are then directly available on your PATH and thus executable independent of your current project. You should normally prefer local, project specific packages if possible, mainly because global packages are not included in the project dependencies and you might run into problems when requiring different versions of the same package between projects.
Restoring packages
As I mentioned, you normally don’t commit the node_modules folder to your VCS. Thus, when a you as a developer, or the buildserver retrieves the source code from your VCS, somehow, the packages need to be restored. This is where the package.json file comes into play again. By having it in the root directory, executing..
$ npm install..instructs NPM to read the dependencies in the config file and to restore them using the specified version.
Versioning
NPM packages use Semantic Versioning.
Given a version number MAJOR.MINOR.PATCH, increment the:
http://semver.org/
- MAJOR version when you make incompatible API changes,
- MINOR version when you add functionality in a backwards-compatible manner, and
- PATCH version when you make backwards-compatible bug fixes.
Each package inside package.json is listed with its according version and upgrade behavior. You can have the following schemes:
1.3.5:
tells npm to use exactly this given version of the package (most restrictive).~1.3.5or1.3.x:
tells npm to only upgrade the given package for increments of the patch version (normally just bugfixes). NPM defines it as~1.3.5 := >=1.3.5-0 <1.4.0-0.^1.3.5:
tells npm it can upgrade to any version smaller than the next major release:<2.0.0. This is the new default behavior when you install node packages (before it was~). NPM defines it as1.3.5 := >=1.3.5-0 <2.0.0-0.latestor*:
tells npm to always update to the latest version (not recommended).
Not sure you understood semantic versioning?? NPMJS has created a nice page with a visual illustration of the included versions for any semver string: http://semver.npmjs.com/
Bower
Bower is to the web browser what NPM is to Node.js. It is a package manager for your front-end development libraries like jQuery, Bootstrap and so on.
![]()
You install Bower as a global package through NPM (obviously)
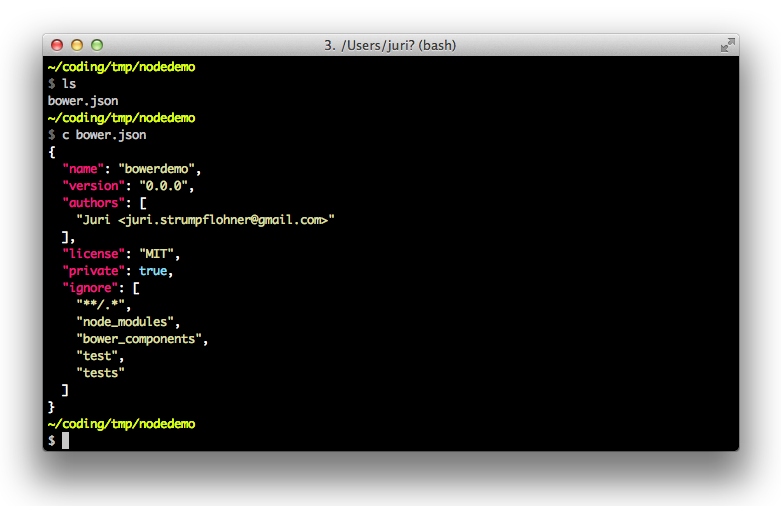
$ npm install -g bowerThen, similarly as you did with NPM, you execute bower init on your terminal to create a new bower.json configuration file (the equivalent of package.json for NPM).
Installing packages is identical to NPM.
$ bower install --save jqueryYou can also download a specific version by appending jquery#1.9.1. Note, the --save (or -S) option adds the dependency to your bower.json config file. Installed packages will be placed in the bower_components directory. It is suggested to not commit that one to your VCS (just as with the node_modules directory).
To uninstall a package simply use
$ bower uninstall --save jqueryWhat’s particularly interesting is that Bower allows you to install packages from any git repository or even a plain URL.
$ bower install git:/github.com/user/package.gitor
$ bower install http://example.com/script.jsIf you require some more advanced configuration, like changing the name of the dependencies directory or its location, you may want to use a .bowerrc configuration file placed at the root of your project directory structure. More about the available configuration options can be found at the official site.
There’s another nice article I found on Medium that gives a quick introduction to Bower which you might want to take a look at as well. Moreover this article gives some useful insights into publishing and maintaining your own packages on bower.
Yeoman
Yeoman has become the de-facto standard scaffolding toolkit for creating modern JavaScript applications.
![]()
Yeoman is built around generators which are either developed by the Yeoman team official generators or by the open source community. Yeoman itself basically just provides the infrastructure for building and running those generators.
Yeoman helps you kickstart new projects, prescribing best practices and tools to help you stay productive. From the official site
What’s nice about such approach is
- that you can quickly get up to speed. Creating a project setup with proper tools and dev support can cost you lots of time and requires expert knowledge.
- that you don’t necessarly have to know all the best practices tools that are currently available on the market. Yeoman assembles them for you, s.t. you can get started immediately. Then once you get more expertise, you can adjust Yeoman’s configuration to make it fit even more to your project needs.
- a great way for you to learn lots and lots of new tools.
Yeoman as well as its generators are distributed as a node modules. Simply install it globally
$ npm install -g yoThen find your generator (i.e. for angular) and install it using the following command.
$ npm install -g generator-angularFinally, execute the generator within your project directory to create a new app.
$ yo angular [app-name]This will create the initial scaffold from which you can then start building your application. But Yeoman goes even further, based on the generator you use, you may also generate single components, like Angular controllers, directives etc. while you develop.
$ yo angular:controller userThat’s all regarding Yeoman’s usage. More advanced topics are about creating your own custom generators. Simply study the docs as they’re quite detailed.
Grunt
Grunt is automation. It is a task-based command line build tool for JavaScript projects. The official headline: “The JavaScript Task Runner”.
![]()
To get started, simply follow the online guide on the official site. There’s also a great book Getting Started with Grunt - The JavaScript Task Runner published by PacktPub, which is ideal for beginners.
Another good presentation is the one by “Cowboy” Ben Alman Bocoup about The State of Grunt (Aug 2014).
Installation
Grunt runs on top of the Node.js platform and is distributed through the npm repository. It comes as two different tools
grunt-cliwhich is the Grunt Command-line interfacegruntmodule
The reason for having two components is to make sure we can run different grunt versions side-by-side (i.e. legacy versions in older projects). Hence, grunt-cli is installed globally while grunt is installed on a per-project basis.
$ npm install -g grunt-cliThen enter the project where you wish to use Grunt and execute
$ npm install gruntGruntfile.js
The Gruntfile.js is the place where you configure the Grunt tasks for your project. It starts as simple as this file:
module.exports = function(grunt) {
  // Do grunt-related things in here
};
The grunt object is Grunt’s API: http://gruntjs.com/api/grunt. It allows you to interact with Grunt, to register your tasks and adjust its configuration.
Grunt modules
Grunt modules are distributed through Node’s NPM directory. Normally, they are prefixed with grunt- and official grunt plugins are prefixed with grunt-contrib. Example: grunt-contrib-uglify.
Hence, Grunt modules are node modules and thus you install them just as I’ve shown before.
$ npm install --save-dev grunt-contrib-uglifyAnatomy of Grunt tasks
You normally start by defining the build tasks like this example of a stringCheck task taken from the Grunt book I mentioned before.
module.exports = function(grunt){
  ...
  grunt.initConfig({
    stringCheck: {
      file: './src/somefile.js',
      string: 'console.log('
    }
  });
}
As you can see, a task is simply a function that you register with Grunt.
module.exports = function(grunt){
  grunt.registerTask('stringCheck', function() {
    //fail if configuration is not provided
    grunt.config.requires('stringCheck.file');
    grunt.config.requires('stringCheck.string');

    //retrieve filename and load it
    var file = grunt.config('stringCheck.file');
    var contents = grunt.file.read(file);

    //retrieve string to search for
    var string = grunt.config('stringCheck.string');

    if(contents.indexOf(string) >= 0)
      grunt.fail.warn('"' + string + '" found in "' + file + '"');
    });
}
Note, externally downloaded tasks through NPM have to be loaded first, in order to be used in your Gruntfile.js. This is done by using the loadNpmTasks on the grunt object.
module.exports = function(grunt){
  grunt.loadNpmTasks('grunt-contrib-concat');
  ...
}
In order not having to do this for every single task you use (which can be quite a lot), you may want to use the load-grunt-tasks plugin and execute require('load-grunt-tasks')(grunt) at the beginning of your Gruntfile.js. This will autoload all grunt modules, ready to be used.
Multitasks
Grunt also allows you to group a task execution as follows:
module.exports = function(grunt){
  ...
  grunt.initConfig({
    stringCheck: {
      target1: {
        file: './src/somefile.js',
        string: 'console.log('
      },
      target2: {
        file: './src/somefile.js',
        string: 'eval('
      }
    }
  });
}
You can then execute them with grunt stringCheck:target1 and grunt stringCheck:target2. target1 and target2 can (and should) obviously be named differently.
Globbing
File globbing or wildcard matching is a way to capture a large group of files with a single expression rather than listing all of them individually which is often not even possible. From the official docs:
*matches any number of characters, but not/?matches a single character, but not/**matches any number of characters, including/, as long as it’s the only thing in a path part{}allows for a comma-separated list of “or” expressions!at the beginning of a pattern will negate the match
All most people need to know is that foo/*.js will match all files ending with .js in the foo/ subdirectory, but foo/**/*.js will match all files ending with .js in the foo/ subdirectory and all of its subdirectories.
Since most of the tasks ultimately interact with the file system, Grunt already predisposes a structure to make task devs’ life easier. If a globbing expession is specified, Grunt tries to match it against the file system and places all matches in the this.files array within your Grunt task function.
Hence, you will see a lot of tasks having a syntax like
target1: {
  src: ['src/a.js', 'src/b.js']
}
or
target1: {
  src: `src/{a,b}.js`,
  dest: `dest/ab.js`
}
It is also possible to define multiple source sets with according destination. For this purpose the files array is used.
target1: {
  files: [
    { src: 'src/{a,b,c}.js', dest: 'dest/abc.js' },
    { src: 'src/{x,y,z}.js', dest: 'dest/xyz.js' }
  ]
}
The following, more compact, object notation is equivalent
target1: {
  files: {
    'dest/abc.js': 'src/{a,b,c}.js',
    'dest/xyz.js': 'src/{x,y,z}.js'
  }
}
Another common task is to copy a set of files to a given directory (for example with preprocessors like SASS or CoffeeScript compilers). Instead of providing the single src and dest instructions we can use the following syntax:
target2: {
  files: [
    {
      expand: true,
      cwd: 'lib/',
      src: '**/*.js',
      dest: 'build/',
      ext: '.min.js'
    },
  ],
}
The expand property tells Grunt to generate a corresponding destination for each matched file. cwd stands for the current working directory, src and dest are self explanatory and ext is the extension to be used for the destination files. More options can be found in the official docs.
Running tasks
Ultimately your goal is to execute the Grunt tasks you defined. If you remember, you previously installed the grunt-cli tool globally which you can now use to run a task.
$ grunt task1 task2If you have a multitarget task, then use : to specify it.
$ grunt task:target1If you run $ grunt instead, the default task will be executed which you can configure as follows:
module.exports = function(grunt) {
  grunt.registerTask('build', function() {
    console.log('building...');
  });

  grunt.registerTask('test', function() {
    console.log('testing...');
  });

  grunt.registerTask('default', ['build', 'test']);
};
Having this Gruntfile.js configuration executes build and test when you type grunt into your console.
Gulp
UPDATE: Meanwhile Gulp has become more popular and the default choice of many web developers. I'll update this section with a more detailed description of its features and example setup. Check back soon or subscribe to either my Twitter profile or RSS feed to get notified when updates are ready.
This intro wouldn’t be complete if it doesn’t mention Gulp. Gulp is the JavaScript task runner newcomer built on top of Node.js streams. It aims at making build scripts easier to use by “preferring code over configuration” (unlike Grunt which is based on configuration).
![]()
gulp’s use of streams and code-over-configuratin makes for a simpler and more intuitive build. gulpjs.com
I didn’t study it in detail yet, but you should definitely keep an eye on it as it is fastly growing and gaining in popularity.
For now I won’t include more details, but I definitely will update this article once I’ve taken a closer look at it.
References
Here are some links to related articles.